 Save
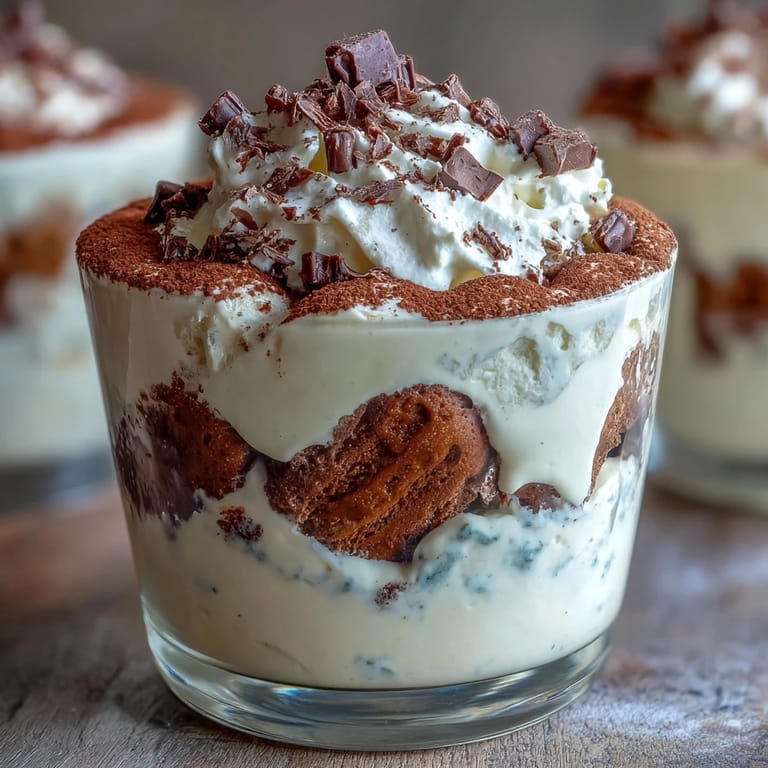
Save My friend Sarah texted me a photo of a Vanilla Bean Frappuccino from our favorite coffee shop, and I couldn't stop thinking about how that smooth, creamy vanilla would taste layered with espresso and mascarpone. That afternoon, I raided my pantry for ladyfingers and decided to recreate the magic at home, turning a coffee shop craving into something I could make in my own kitchen. The result was so silky and elegant that I've made these cups at least a dozen times since—they've become my answer to the question, what do you bring to dinner when you want to impress someone?
I made these for my book club last spring, and one member asked for the recipe before dessert was even finished—she said it tasted like someone bottled the feeling of a perfect morning coffee break. Her reaction made me realize that sometimes the best recipes are the ones that bridge that gap between everyday comfort and special occasion elegance. Now she makes them for her own gatherings, and I love knowing these little cups are making the rounds.
Ingredients
- Heavy cream: Make sure it's truly cold from the fridge; this helps it whip to those perfect soft peaks that make the whole mousse cloud-like.
- Vanilla bean: If you can find real vanilla beans, scrape those tiny black seeds out yourself—the flecks are beautiful and taste more alive than extract ever could, though vanilla bean paste works beautifully in a pinch.
- Powdered sugar: Sifting it first prevents lumps and keeps your cream silky smooth.
- Mascarpone cheese: Keep it cold and don't let it warm up while folding, or it'll break and get grainy instead of staying creamy.
- Strong brewed espresso: Use real espresso if you have an espresso machine, but strong coffee works just fine—the key is letting it cool completely so it doesn't melt the cream.
- Coffee liqueur: Optional, but it adds a subtle depth; Kahlúa is classic, though I've skipped it for a cleaner vanilla focus.
- Ladyfinger biscuits: Buy the crispy Italian ones (savoiardi) if you can find them; they hold up better to the dipping than softer versions.
- Cocoa powder: Dust it on just before serving for that signature tiramisu moment.
Tired of Takeout? 🥡
Get 10 meals you can make faster than delivery arrives. Seriously.
One email. No spam. Unsubscribe anytime.
Instructions
- Whip the cream into clouds:
- Pour your cold heavy cream into a bowl with the vanilla bean seeds and powdered sugar, then whisk by hand or with a mixer until you see soft peaks forming—they should look fluffy and hold their shape for a moment before falling back. Stop as soon as you get there; over-whisking turns it into butter, which I've learned the hard way.
- Fold in the mascarpone gently:
- Add the cold mascarpone to your whipped cream and fold it together with a spatula using wide, slow strokes until there are no white streaks left. Think of it like you're tucking a blanket rather than stirring; rough treatment breaks the airiness you just built.
- Mix the espresso dipping bath:
- Stir together your cooled espresso and coffee liqueur (if using) in a shallow dish, making sure it's at room temperature or cool so it won't shock the cream when ladyfingers meet it.
- Dip and layer the foundation:
- Take each ladyfinger and dip it quickly—one second per side—into the espresso mixture; you want them kissed, not drowned. Arrange them in a single layer at the bottom of each glass, breaking them to fit if needed.
- Build the first cream layer:
- Spoon a generous dollop of the vanilla mascarpone cream over the soaked ladyfingers, spreading it gently to create an even layer that fills the glass about halfway.
- Add the second layer of texture:
- Dip another round of ladyfingers and arrange them on top of the cream, then finish with a final layer of the vanilla mixture smoothed to the top. This structure is what makes each spoonful interesting.
- Chill until set:
- Cover the cups and slide them into the refrigerator for at least 2 hours; this time lets the flavors meld and the texture become creamy rather than mousse-like. You can even make these the night before if you want.
- Finish with flourish:
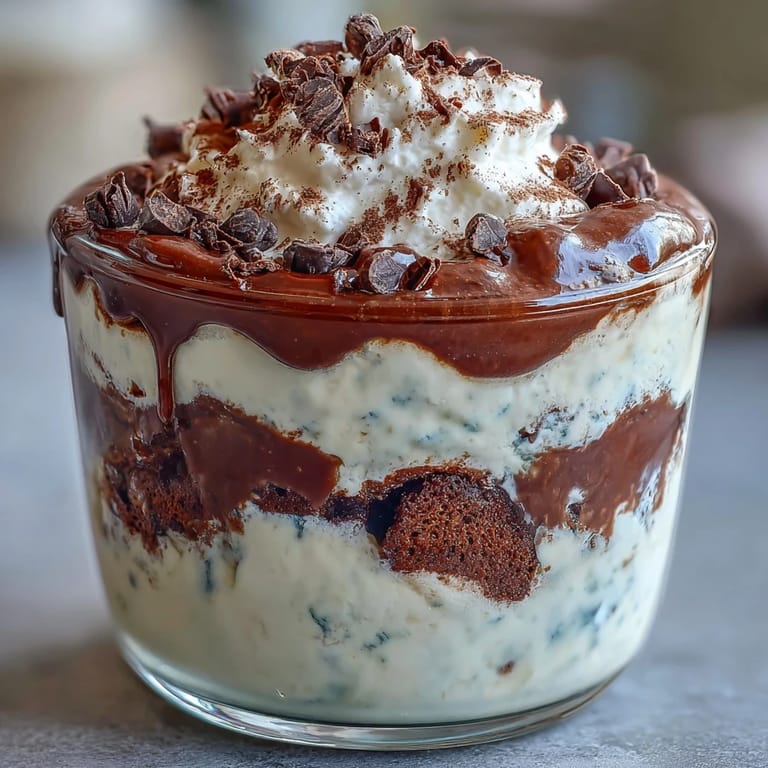
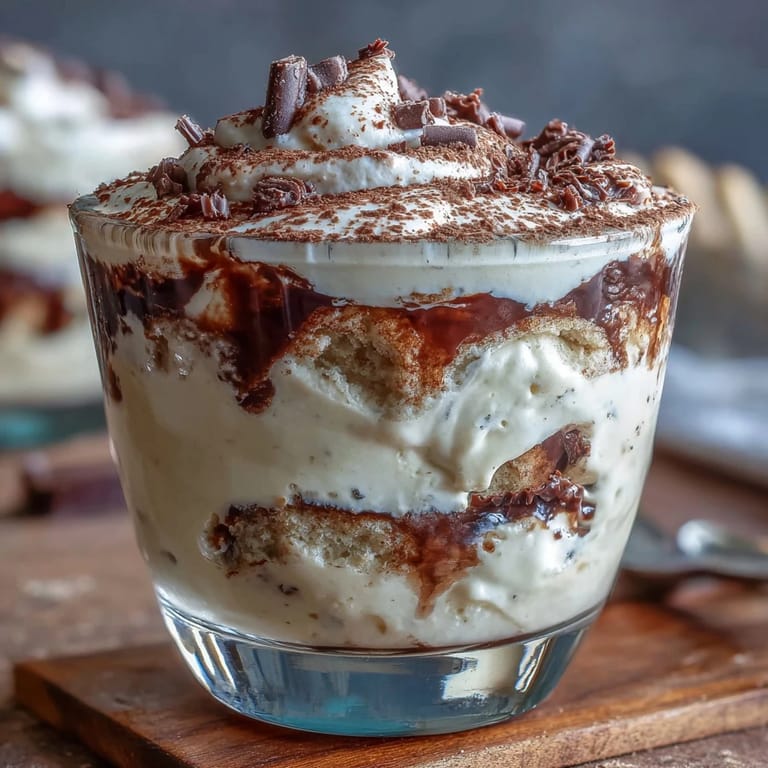
- Just before serving, dust the tops generously with cocoa powder using a fine sieve, then add a dollop of whipped cream and perhaps a chocolate shaving or coffee bean if you're feeling fancy.
 Save
Save These cups remind me that sometimes the smallest things matter most—how the cocoa powder catches the light, the way someone's eyes light up when they taste that first spoonful and realize it's both coffee shop comfort and homemade care. That's the real magic of this recipe.
The Vanilla Bean Question
I spent way too much money on vanilla beans before I realized I could buy them online in bulk and split the cost with friends. Real vanilla beans are becoming easier to find at better grocery stores, and honestly, they're worth the investment if you're making desserts regularly. If budget is tight, vanilla bean paste tastes authentic and costs less, while vanilla extract is perfectly fine but tastes a bit sharper in comparison.
Why Individual Cups Change Everything
Serving tiramisu in individual cups is practical and pretty, but there's something else happening—each person gets their own perfect bite without anyone having to negotiate with a cake server. I started making tiramisu this way after a dinner party where someone accidentally crushed the whole dessert trying to scoop out a piece, and now I can't imagine making it any other way. The layering is cleaner, the presentation is automatic, and honestly, there's something indulgent about getting your own private portion.
Make-Ahead Magic and Storage
These cups are the ultimate dinner party insurance because you can make them up to 24 hours ahead, which means you're free to focus on the main course instead of stressed about dessert timing. They sit happily in the refrigerator covered with plastic wrap, and the flavors actually get better as the coffee soaks deeper into everything overnight. When you pull them out to serve, all you do is dust and top—it takes about two minutes total.
- Store covered in the fridge for up to one day; any longer and the ladyfingers start to get mushy instead of tender.
- Don't add the cocoa powder and toppings until right before serving, or the powder absorbs moisture and loses that beautiful contrast.
- If you want to serve them very cold, pop them in the freezer for 15 minutes before garnishing—it keeps the texture perfect longer.
 Save
Save These Vanilla Bean Frappuccino Tiramisu Cups have become my answer to the question every home cook asks: how do I make something that tastes like it came from a fancy café but actually came from my own kitchen? Once you nail the layers and the timing, you'll find yourself making them again and again.
Recipe FAQs
- → What is the best way to soak the ladyfingers?
Dip each ladyfinger quickly (1-2 seconds per side) into cooled espresso to avoid sogginess and maintain structure in the layered cups.
- → Can I substitute the vanilla bean with extract?
Yes, pure vanilla extract can be used if vanilla beans are unavailable, though it may slightly alter the depth of vanilla flavor.
- → Is coffee liqueur necessary for the espresso dip?
No, coffee liqueur is optional and can be omitted for a non-alcoholic version without sacrificing much on flavor.
- → How long should the cups chill before serving?
Refrigerate the assembled cups for at least 2 hours to allow the layers to set and flavors to meld warmly.
- → What garnishes complement these cups nicely?
Dusting cocoa powder, whipped cream, chocolate shavings, or a single coffee bean add attractive finishing touches and enhance the flavor profile.
- → Can these cups be prepared in advance?
Yes, they can be assembled up to a day ahead and kept chilled until serving to ensure convenience and flavor development.